Mastering Layered Vinyl: A Step-by-Step Guide
Layered vinyl projects are a fantastic way to add dimension, color, and creativity to your Cricut designs. By stacking multiple layers of vinyl, you can create eye-catching designs for t-shirts, mugs, home decor, and much more.
CRICUT
10/31/20244 min read
Layered vinyl projects are a fantastic way to add dimension, color, and creativity to your Cricut designs. By stacking multiple layers of vinyl, you can create eye-catching designs for t-shirts, mugs, home decor, and much more. However, mastering layered vinyl requires some technique, practice, and the right tools. In this in-depth guide, we’ll walk you through the step-by-step process of creating stunning layered vinyl projects, from choosing materials to perfecting your layering technique. Plus, we’ve included Amazon product suggestions to help you get everything you need to master this craft.
What is Layered Vinyl?
Layered vinyl is a technique in which you stack multiple layers of adhesive vinyl or heat transfer vinyl (HTV) on top of one another to create a multi-colored or multi-dimensional design. This method allows for complex, vibrant designs that pop. It’s great for making personalized shirts, bags, mugs, and signs.
Tools and Materials You’ll Need
Before you dive into your layered vinyl project, make sure you have all the essential tools and materials. Here’s what you’ll need:
Cricut Machine (such as Cricut Explore Air, Maker, or Joy)
Vinyl Cutting Mats (StandardGrip or LightGrip, depending on your material)
Adhesive Vinyl or Heat Transfer Vinyl (HTV) in multiple colors
Transfer Tape for adhesive vinyl
Cricut Weeding Tools to remove excess vinyl
Cricut EasyPress or Household Iron for HTV
Cricut Explore Air 2 Machine – The Explore Air 2 is perfect for cutting layered vinyl designs and handles different materials easily.
Cricut Weeding Tool Set – This weeding tool set helps you easily remove small, intricate pieces of vinyl from your designs.
Step 1: Choose Your Design and Plan the Layers
The first step to creating a layered vinyl project is to choose or create your design in Cricut Design Space. You can either use pre-made designs or create your own multi-colored design by grouping different elements together.
Tip: Break your design into different color layers. For example, if you’re making a sunflower, one layer could be the yellow petals, another the brown center, and another layer the green stem and leaves.
Once you have your design ready, Design Space will automatically separate the layers by color, making it easier for you to cut each layer individually.
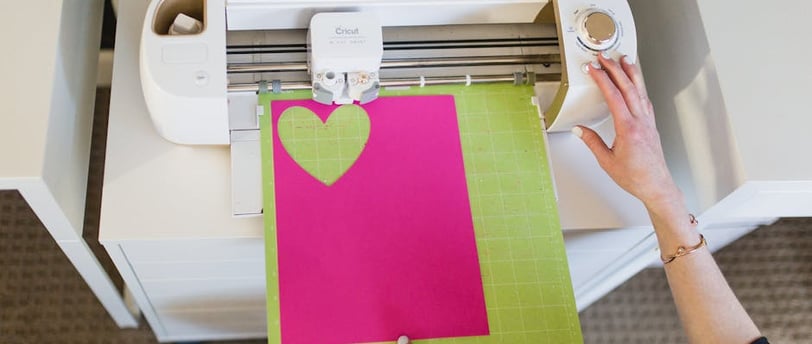
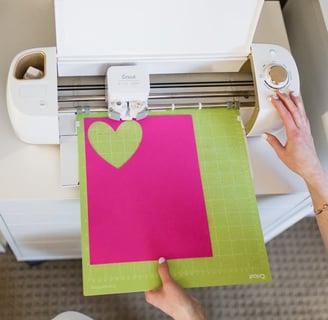
Step 2: Cutting Your Vinyl Layers
After your design is ready, it’s time to cut each layer on your Cricut machine. You’ll need to load one color of vinyl onto the cutting mat at a time and cut each layer separately.
Steps for Cutting Layers:
Place your first color of vinyl on the cutting mat (use a StandardGrip or LightGrip mat, depending on your vinyl).
Load the mat into your Cricut machine.
In Design Space, select the color you want to cut, then press "Make It."
Once the first color is cut, repeat the process for each remaining color.
Cricut Standard Grip Mat – This mat is perfect for cutting adhesive and heat transfer vinyl with your Cricut machine.
Cricut Premium Permanent Vinyl – High-quality permanent vinyl in multiple colors for layering projects.
Step 3: Weed the Vinyl
Once each layer is cut, you need to weed the vinyl to remove any excess material. This step involves carefully pulling away the vinyl that you don’t want in your final design, leaving only the parts of the design that will be transferred.
Tip: Use a weeding tool for intricate designs to help remove small pieces of vinyl without tearing.
Cricut Weeding Tool Set – This precision set includes all the tools you need to easily weed complex designs.
Step 4: Layer Your Vinyl
Now that you’ve cut and weeded all your layers, it’s time to start stacking them.
For Adhesive Vinyl:
Use transfer tape to transfer each layer of vinyl onto your project surface. Start with the bottom-most layer first.
Carefully align the layers, ensuring that each layer is perfectly placed before transferring the next one.
Apply pressure to remove air bubbles and ensure the vinyl sticks properly.
For Heat Transfer Vinyl (HTV):
Place the bottom-most layer on your project (such as a t-shirt) and use a Cricut EasyPress or household iron to adhere it.
Apply heat for the recommended time (refer to Cricut’s heat settings guide).
Once the bottom layer is set, align and press each additional layer one at a time. Be careful not to overheat the bottom layers during the process.
Use parchment paper or a heat-resistant sheet over previously applied layers to protect them when pressing additional layers.
Cricut Transfer Tape – Ideal for applying your adhesive vinyl layers smoothly without damaging the design.
Cricut EasyPress 2 – A must-have tool for perfectly applying heat transfer vinyl layers without the risk of uneven heating.
Step 5: Perfecting Alignment
Getting the perfect alignment is one of the trickiest parts of layered vinyl. Here are some tips to help:
Use Registration Marks: Add small circles or lines to each layer in your design that you can use to line up the layers. Once the layers are aligned, you can remove the registration marks.
Center Your Design: Always make sure your design is centered on your project, whether it’s a shirt, mug, or sign. Use a ruler to measure the center point to help guide your placement.
Layer from Bottom to Top: Start with the base or background layer and work your way up, ensuring each layer is properly aligned before moving on to the next.
Step 6: Finishing Touches
Once all your layers are applied, give your project a final check to make sure everything is properly adhered. If using HTV, ensure each layer is securely bonded by giving it one last press with your EasyPress. For adhesive vinyl, smooth out any remaining bubbles with a scraper tool.
Cricut Scraper Tool – This tool helps to apply even pressure and smooth out vinyl, ensuring no bubbles or imperfections remain.
Layering Vinyl Tips & Tricks
Use Multiple Colors for Impact: Layered vinyl looks best when you use bold, contrasting colors. Don’t be afraid to mix and match different shades to make your design pop.
Practice with Simple Designs: If you’re new to layering vinyl, start with simple two-layer designs before moving on to more complex multi-layer projects.
Patience is Key: Layering vinyl takes time and patience. Rushing the process can result in misalignment or air bubbles, so take your time to ensure each layer is perfect.
Layered vinyl projects can elevate your Cricut crafting to a whole new level, adding depth and dimension to your designs. By following this step-by-step guide and using the right tools and materials, you’ll be able to master the art of layering vinyl and create stunning, professional-looking projects. Whether you’re working with adhesive vinyl or HTV, the key to success is careful alignment and patience. With the product suggestions included here, you’ll have everything you need to get started and create beautiful, layered vinyl projects in no time! Happy Crafting!